 Photos by Richard I’Anson
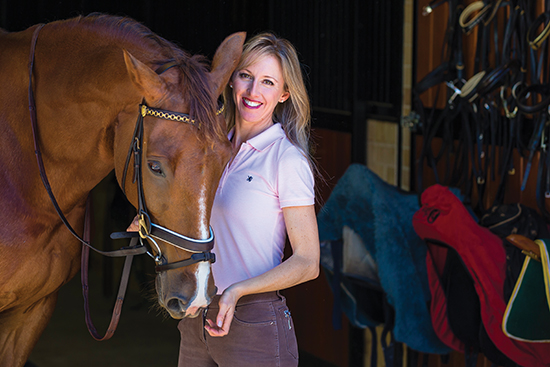
Dressage Coach and Pilates Instructor Rebecca Ashton shows you how to get on your horse, feeling great and ready to star at your next competition..
Good pre-competition preparation can mean the difference between being amongst the ribbons or going home before the prize giving. The following exercises will get you mentally focussed, improve your body awareness and warm you up before your test. Better still, they only take a few minutes and can be done in the back of your horse float!
BEFORE WE START
The exercises are meant to wake your muscles up and get them ready for the job at hand, not wear you out, so go slow and steady. The three things to think of before beginning the exercises are Alignment, Breathing and Core (ABC).
BODY ALIGNMENT
We want our back to be in a neutral position where all the natural curves of the backbone remain unchanged, whether we’re sitting on a horse, walking around or executing the following exercises. These curves give “suspension” and lessen impact. The vertebrae all fit together like a jigsaw puzzle, cushioned by intervertebral discs so to minimise wear and tear. If out of alignment, we may get discs wearing unevenly or pressured to bulging point. We will also get blockages that will not only cause back pain but will also inhibit correct use of joints. Neutral is best described as a zone rather than one set position as we are all built differently.
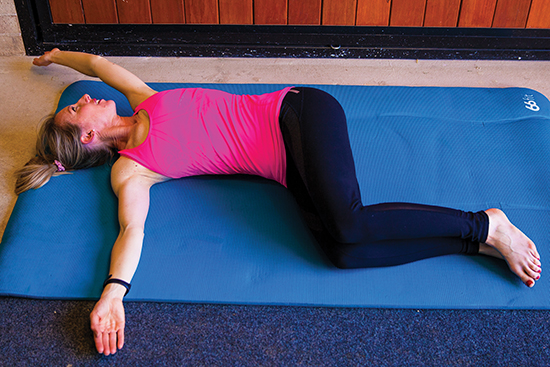
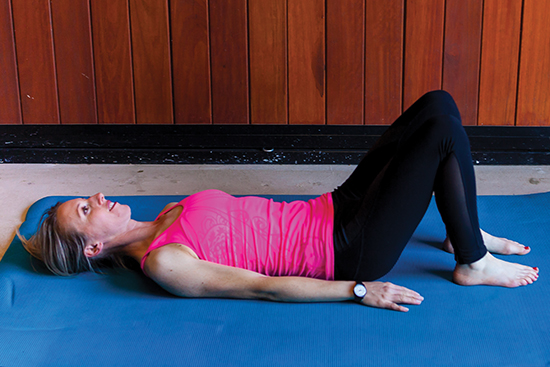
How to obtain a neutral spine while lying on your back with knees bent:
– feet/knees hip width (will not be on horse)
– slight curve maintained in the lumber region of the back
– long through the waist
– ribs resting heavy on the ground
– chest wide
– shoulders down but not excessively back
– head carried gently on shoulders
BREATHING
Focusing on breathing will get oxygen deep into the body to get the muscles ready for work and also keep you calm. Breathe by keeping the core engaged (see below), the shoulders relaxed down and expanding the lungs and ribs. Remember, the lungs don’t just take up space in the front of our chest, but all the way to the sides and the back as well. Sometimes we forget to breathe into these areas!
THE CORE
The core consists of the deep muscles of the pelvis. They are the ones closest to the bones whose job it is to hold us upright. It is also these muscles, as opposed to the big, outer muscles of the body, that we are focussing on in these exercises.
Engaging the core: The two muscles we focus on are the sling of muscle across the front of our lower abdomen, the transverse abdomens and the pelvic floor muscles. We can think of gently tightening a hipster belt to activate the transverse muscle or think of a pelvic elevator lifting up to engage the pelvic floor.
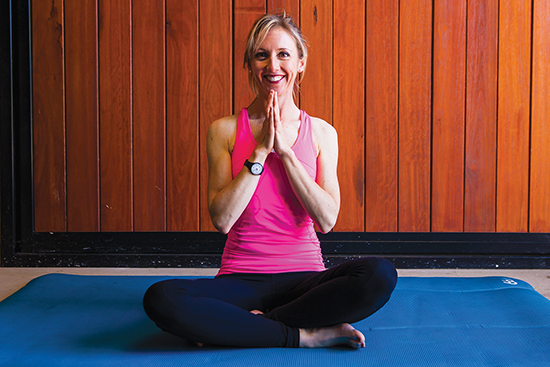
THE EXERCISES
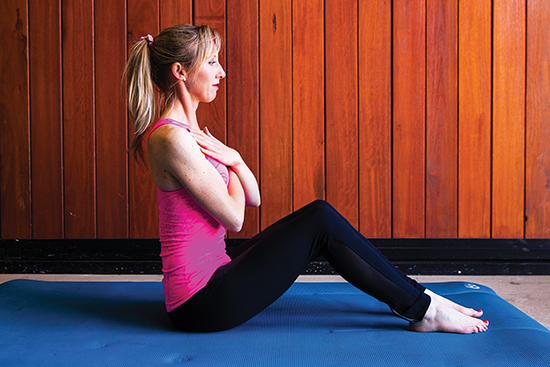
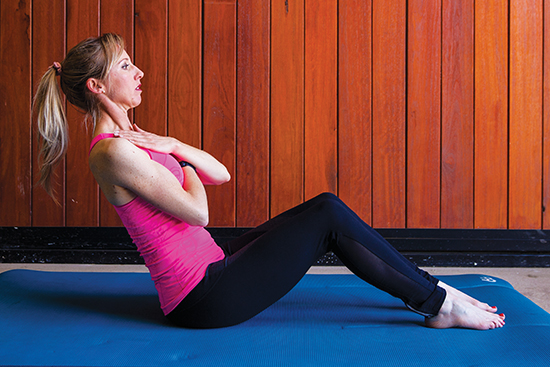 FLAT BACK
Why? This exercise tests the strength of our back extensors and abdominals. It allows for better ability to stay tall and elegant in the saddle and for a longer period of time.
How?
– ABC
– Sit with knees bent. Keeping a neutral spine, lean back and then return to the start position. Keep lifting your head to the sky throughout the whole exercise to help keep you tall.
Watch out for:
– Gripping or lifting with feet
– Slouching waist
– Collapsing the pelvis under you
– Hunching shoulders
– Weight more on one seat bone than the other
NB: Never lean back so far back that you feel pain in your back. Your abdominals must be strong and supportive at all times.
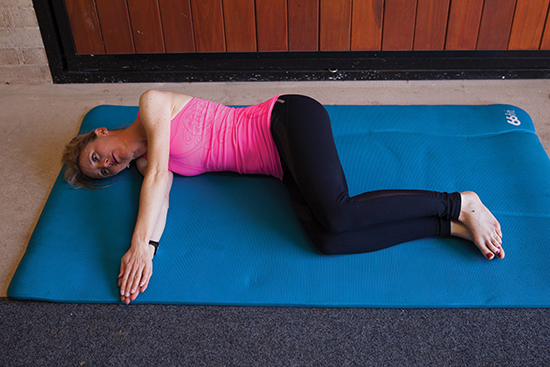
 CHALK CIRCLES
Why?
– To open and loosen the thoracic part of our spine (horse riders are often tight here)
– Remove blockages in this area so the movement of the horse can be better absorbed
– Twist through the body to improve position for circles and lateral work
– Help correct a hollow chest
How?
– ABC
– Lie on your side arms facing out in front of you, keeping the waist on the underside lifted to maintain a neutral spine and pelvis.
– With the top arm, make a big arc over your head the continue to circle back around to start position. Follow your hand with your eyes.
Watch out for:
– Top hip collapsing (should remain highest point)
– Not following hand with eyes
– Hunched shoulders
– Arm not reaching enough
– Movement in pelvis area – It should remain still
Chest openers are an easier option.
 TWIST (ON OR OFF THE HORSE)
Why?
– For awareness of “diagonal bracing”, ie: keeping a feeling of connection between the shoulder and its opposite hip.
– To improve movement in thoracic region
– To test for unevenness which may hinder lateral movements such as shoulder in, travers, renvers and half pass
– Helps awareness with hip to hip / shoulder to shoulder ie: our shoulders and hips being in the same line as the horse’s shoulders and hips
– Helps in keeping shoulders equally above the hips to correct any collapsing of the waist.
How?
– ABC
– In a sitting position, the twist begins with the head and neck and moves down the spine like a barber’s pole.
– Reverse movement on the way up (bottom to top)
Watch out for:
– Taking the hands around without the body
– Lifting shoulder opposite to the direction you are twisting
– Losing the tension connection between the opposite shoulder and hip
– Not keeping even weight on both seat bones
– Twisting pelvis – It must be still and stable
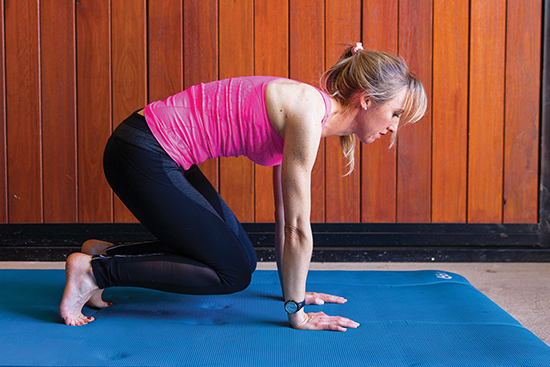
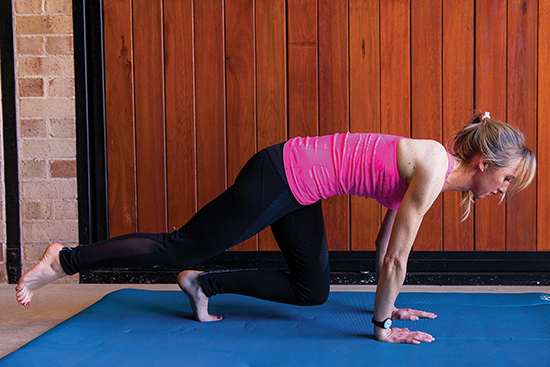 LIFTED KNEE STRETCH
Why?
– To get the pelvis stabilised and to stretch the back.
– Teaches the body to use the legs without moving the torso, just what we need on the horse!
How?
– To begin with, just holding this position may be challenging enough.
– On all fours have your hips over your knees, and shoulders over your hands.
– From this position move your hands back towards your hips and round your back.
– Tuck your toes under and lift your knees off the ground.
– Always keep your tummy lifted to help support your back.
– For more of a challenge, you can lift one foot off the ground, without any change in your torso, and extend the leg back.
– Return it to the start position and repeat with the other leg.
Watch out for:
– Dropping tummy
– Loss of stability in torso
– Twisting of the pelvis
– Favouring one arm or foot and not maintaining equal weight on all points
– Bottom lifting too high as a result of knees not bending under the body enough
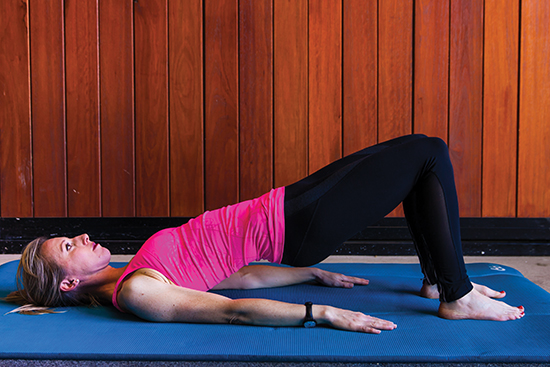 SHOULDER BRIDGE
Why?
– To improve mobility in the hips.
– Open hip flexors
– Massage central nervous system (Helps to put us in a good state of mind and get in the “zone” before we ride)
– Remove blockages along the spine which would impede the shock absorption ability of the backbone
How?
– ABC
– Lying on your back, knees bent
– Switch off the big muscles of the legs
– Start the movement with gluteus maximus and peel your vertebrae off the floor one at a time until your body is in a diagonal line
– Roll back down to start position one vertebrae at a time
Watch out for:
– Non-sequential movement in the spine/ flat back
– Tilting pelvis that favours one side and doesn’t remain straight
– Hamstrings taking over
– Shoulders hunching
– Doming tummy
Aim for 10 reps of each exercise, but never do so many that you lose your form. Work smart and stay focused. The exercises mean you will spend less unproductive time in the saddle getting your body warmed up and wearing your horse out. Save that energy for the competition ring.
This article first appeared in the October 2013 issue of THM.
Want more articles by Rebecca? Go to her Who’s who page,,,