

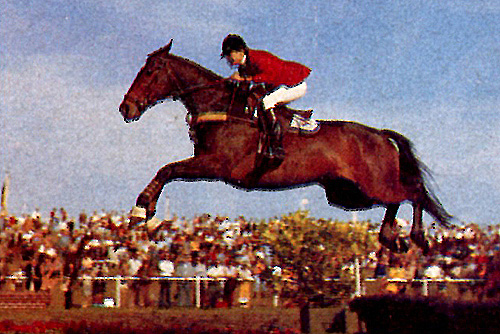
Back in 1980’s Kathy Kusner conducted a Clinic in Australia, Ros Neave was there…
Kathy Kusner represented the US at the 1964, 1968, and 1972 Olympics, held the US Ladies High Jump record and won the Ladies European Showjumping Championships in 1967. In 1967 and 1968 Kathy was in eight winning Nations Cup Teams and helped to win the President’s Cup for the United States. She was also the first licensed woman jockey in the US and won on the flat and over jumps at home and abroad. She is a skilled aircraft pilot, a scuba diver and a competitive runner on the track and in road races and marathons.
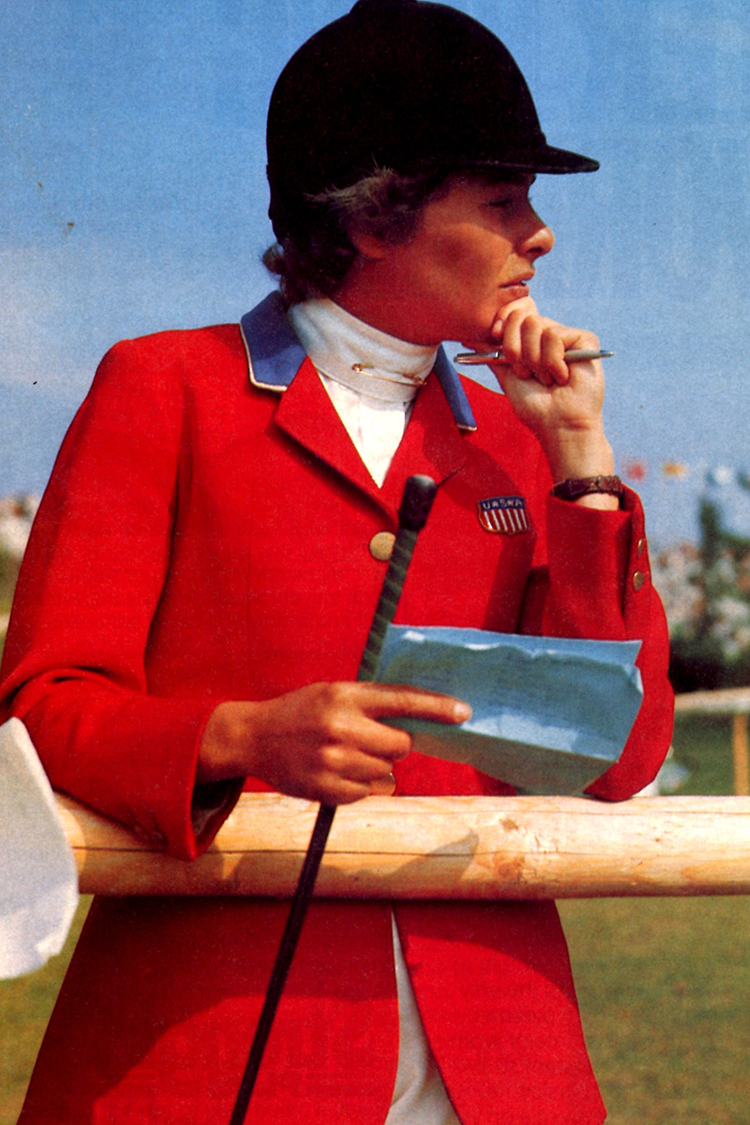
She is ALSO a gifted teacher in the skills and techniques of showjumping, and on a recent visit to Australia she set about inspiring a few of our riders and their horses.

The lady herself is a tiny ball of energy and life and puts all of this into her teaching – every word is to be noted, every point made to a rider is of interest. Taking notes is near impossible, for fear of missing some great pearl of wisdom, witticism, or line of poetry which make up the tapestry of one of Kathy’s lessons. So it was with great confidence that I proceeded to an interview with Kathy at lunchtime on my first day of her Clinic in Australia.
‘I’ll just plug in the recorder and listen – after all Americans are the easiest people in the world to interview. Just push record and play and let her go’, I thought. Not so.
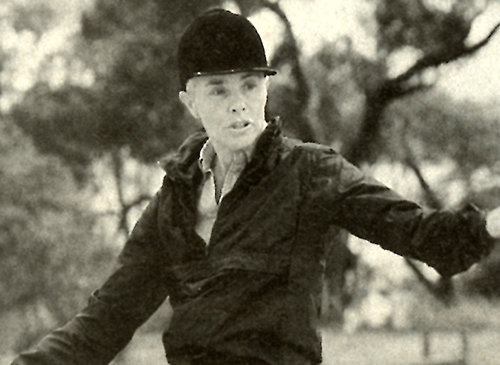
Kathy just would not answer questions, but she was full of apologies: “Oh I’m an awful interview, I hate all this, I know I’m terrible, I’m sympathetic. If you can somehow manage to get it during the sessions, I have to recharge the batteries.”
She did however outline her program in the clinic.
“At the end of three days we’re just getting through the basic important things, but there’s many many more things that would be nice to add on to if we had more days. There’s just so much information and what I do when I give a clinic, is start with the most critical things that are important, and then the second most critical things, and the third most critical things. Then when those things are working, you can keep adding on the fourth and the fifth, working so that it is sufficient, not perfect. When the clinic is finished after three days what you’ve done is gotten the most necessary basics to jump courses, and all of the people are doing it to some degree, not perfect.”
“Again if we had those same people for more days or another clinic, then you would go on to five and to six and to seven and ninety five and ninety six and ninety seventh most important things, and that’s the way it goes, and it never ends really. It’s not necessary to have the ninety five, ninety six and ninety seven parts really, but you sure have to have the one-through-ten working to jump courses correctly and to jump courses consistently well with lots of different horses. So I sure try to get through those most important basic ingredients so that consistent performances can happen.”
I spent another three sessions following Kathy around the arena, when she wasn’t demonstrating on a horse, with my recorder. I even had a job with one new group, I was ‘name helper’. Kathy stressed that when you went to lots of different instructors, you filed what they had to say away in a folder, and when you needed what they had to say, you brought out their recipes. So, I’ve filed some of Kathy’s notes for you, under the following headings…

GEAR
Kathy wanted riders to work with as simple gear as possible. She watched the horses work, and then in all the sessions I saw, she asked riders to remove martingales. In a few cases Kathy suggested to riders that they compete in their martingales and at least one case I saw, she strongly advised against it – saying it would encourage the particular horse more on to it’s forehand. She said she liked to work with plain snaffles and cavesson nose bands unless the horse really crossed it’s jaw, as opening the mouth could be a form of giving the jaw. She told a great story about her ‘bag of bits’.
“I used to always travel to shows with my ‘bag of bits’, everything you could imagine – including a bicycle chain bit. One day Bill Steinkraus took me aside and told me I didn’t need all those bits, I should have a ‘bag of hands’ not a bag of bits. Not long after he was having trouble with a horse he was showing and he came to me… and asked to borrow my bicycle chain bit and went on and won the next three classes on the circuit. I believe we were both partly right.”
She told riders to use whatever they needed to get showed, but at home to work in the simplest possible gear.
POLES ON THE GROUND
The first session I watched began with a group of competitive riders seriously trotting a course of poles on the ground. The diminutive Kathy setting the tone for the session with a delightful blend of humour and information and that gift of the brilliant instructor which pushes the pupil as far as possible and then puts him or her together again. “Come on Peter, ride like Conrad Homfeld, you’re Conrad, you can do it Conrad.”

“A good approach to poles on the ground is essential. Use the same approach to poles as a jump. We want to make the horse confident in our hands. Think about not leaning but really giving so that the neck stretches out and the horse looks at the jump as much as he will. Not leaning, just giving and allowing him to stretch out. Don’t put your hand down, carry it so it’s alive.”
“Less experienced riders should give with the hands resting right up on the top of the horse’s crest, not leaning any more than they have to. If the rider is a little bit greener yet, then two of the fingers that are around the reins on one hand catch the mane right against the ridge of the neck, and the other hand will just sit next to the one that is catching the mane. I’m saying this for the greener rider, but I use it too, I catch the mane, when I need it. It’s got to be mane right against that ridge, if you catch that hair up a little bit the rider’s hand will come up a bit over the jump, and he’ll get left behind.”
“Even just trotting over poles, make all of these technical things as perfect as you can and don’t look down. If you don’t look where you want to go, it won’t work.”
CANTER
For a long time we felt that a horse had to be nice and round to jump effectively. With the vision of the crack German riders and their dressage style jumpers in mind, riders worked hard on getting their jumpers to tuck their noses in neatly and bowl along. Then came the Americans, like Joe Fargis riding Touch of Class, galloping free, with the horse’s nose tipped out, how the jumping horse ought to travel.
Certainly Kathy wanted her students to control the horse’s stride as this she explained was essential to getting the right stride on a jumping course…
“Start with that ordinary canter, just relax the arm and let it loosen so the drive gets a bit bigger and the pace picks up, give with reins and let his frame get longer, his nose comes out further and the stride loosens up. What happens is the rider’s arms loosen up and the horse’s stride loosens up, and we have a working canter. Now to bring it back to an ordinary canter, the rider lightens the seat a little as he gets the horse back towards his quarters, and then the rider will softly sit again.”
“To add another gear, we can bring the horse back to collected canter, carry your hands a little higher, push your legs further forward, and as his mouth goes up, follow it up a little, and just see how slow you can get him. Be friendly, wait and give on the sensitive horse. They don’t want to do it at first because it takes a lot of energy to go more collected. Try to keep the neck as straight as you can, it will help you. Pick your hand up a little more for the collected. Then let him relax again to ordinary canter, so give with your rein and let the stride loosen up – you can either sit or come into a half seat. Keep your arm light, don’t push down and stiffen your arm, just keep it where it’s really loose and really giving. Put your hand half way up the neck with a big loop in the rein like you’re jumping. Lift your hand up and come back to collected, and give forward as he comes back to you. Pick the front up and take it back to the quarters. You can’t get a light collection if he’s crooked, think forward with the rein and get his neck straight and you’ll get more horse back on his quarters.”
“Come back to walk with a light seat, taking and relaxing, and post the big trot steps, and give, give, give so he steps forward through the transition.”
Position next…
Breeding a showjumper in Australia? Go to www.ihb.com.au and select a stallion with Europe’s best bloodlines – like Chacfly – there’s many more to choose from…
POSITION
No nation on earth rides jumping horses like the Americans – they have such style over a fence – and that style is the product of a national obsession with position in the saddle…
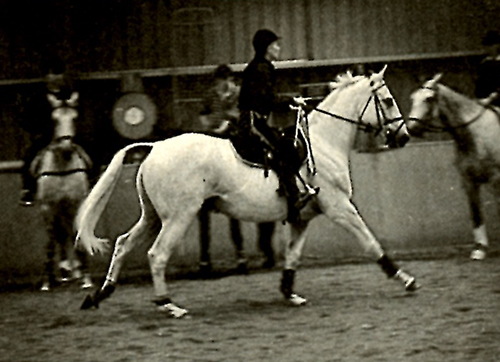
Kathy and Old English in Germany in 1974
“Keep the stirrup iron straight across the ball of your foot rather than across your toes. Your lower leg should remain directly below you so that your stirrup leather will hang straight. If anything, allow your lower leg to be angled fractionally forward rather than back. Your heel is pushed down with relaxed weight. You do a lot of work against your heel when you make a downward transition, your heel is what gives you that brace and stops you falling forward. It will make you very secure so your arms can be totally independent. Attempt to stretch down into your heel with each post, keeping your heel as deep as possible.”
“Everyone should wear spurs, because the spur is silent when you don’t need it. The leg is like the rein, it doesn’t clutch, it’s alive, the same way that you don’t hold with the rein, you take and give, and the leg doesn’t go bump, bump, bump. Don’t take the lower leg off the side, it lives there, don’t take weight in your knees. Your lower leg is very friendly and it talks to the horse – we have to be able to ask for a little bit more pace or more energy or sometimes both, and it has to be there to make that request.”
“Your upper body should just be natural and neutral and relaxed. You’re not leaning forward, and not leaning back and not leaning off to the side.”
“Your rein needs to be short enough for your hand and arm to be out in front of you where you can really regulate and give and do everything without running out of places to go. Relax your hands and forearms apart, feel total relaxation and independence in each arm.”
“Keep your hands flat and wide, wider than the bit and nearly as wide as the horse’s hind legs. Never use indirect rein. You’ll hear people say all the time ‘Put your hands down, don’t get his head up.’ But you won’t hear the people who are going in that ring to jump those giant Olympic courses say that, they’re not thinking about pushing their hands down and getting their heads down. They’re thinking about getting the hind legs over the jumps.”
LENGTHENING
All the time the visiting instructor was working on how the horse was travelling, building that same free floating stride that has brought so much success for the American riders…
“I don’t want faster steps, I just want longer steps, so my reins are saying no, don’t go faster. It should never be that the horse gets faster, it should be that the steps get longer. Just relax the arm down and let the neck out so the step can lengthen, the step will basically go out as far as the nose goes out, so we want to let the nose out.”
LEG YIELDING
By now it’s no surprise to local showjumpers when visiting American jumping instructors start their sessions with fairly intensive flat work, polishing the basic gymnastic manoevres of the dressage arena and showing riders how to go on and use their new control of their horses for such niceties not so common in the showjumping arena, as walk canter transitions…
“Start your leg yielding by coming off the short end of your arena and starting straight up the long side for a few strides without using the fence as your barrier. You never want to get close to the wall, we could set fire to that wall, put kerosene on it and light it so we’d better not go near it. With your outside leg, ask his hind end to shift approximately 40 degrees off the line.”
“When you’re teaching your horse, take your inactive leg off, so there is no confusion. Some horses just run through your hand when you are starting leg yield, so just brace your inactive leg against the horse and use your weight to hold yourself in position. The inactive leg gives you leverage and you take it right off the horse’s side to avoid confusion. With your hands keep his front legs on your line. His direction should remain straight up the line, hopefully with his hind and fore legs crossing. Use your inside leg to prevent the angle becoming too great and use both legs together and a ‘give’ to keep him up to the line if he is tending to fade from it. When his hind leg comes across, that’s when you give, the same as you give when you’re reining back, you give when he’s stepping back or you give in turn on the forehand.”
“If you lean forward for anything lateral you’ll lose the clean step behind, never lean back, stay central, stay normal and relax. Lay your leg in the normal position, it just lays against him in the normal position.”
“Do this both ways at walk and then trot remembering to allow him to be straight again for a few strides before you arrive at the end of the arena. When he is accepting and doing what you are asking, try then to feel the outside hind leg as it crosses over the inside hind leg and at that moment try to give to encourage him to continue and improve that inside hind leg movement. This prepares him for the walk canter transition. Try walking in a straight or almost straight line but feel and encourage the weight on his inside hind leg. When you feel it then ask for canter, remembering to release the inside rein with the strike off. If you are timing your canter aids well, he ought to find it no problem.”
SELF CARRIAGE
Kathy wanted her horses travelling up in front – but light and really carrying themselves, so they were back on their hindquarters and able to use themselves to jump. She gave an example of the inexperienced person holding a horse in a bridle, he tends to grip the bit firmly under the horse’s chin, pulling the bit down on the bars of the mouth. What happens? The horse tosses his head and runs backwards. We’ve all seen it. Kathy says this is what we are doing when we try to pull the horses head down with low hands. We are forcing the horse down and back instead of forward and up. She wanted the rider to lift his hands higher than the horse’s head so the bit was working on the comers of the horse’s mouth and he is able to stay up in front, light and to carry himself from behind.
“It’s real important to teach a horse to travel in self carriage so when we put him on to a friendly contact, our contact is allowing us the possibility of putting him together with just a little more compression, it’s just tightening the spring a little bit. Everything comes from the back to the front. So to teach him to travel in self carriage. Make him shorter and rounder and springier to start to train his step, and to train his balance, and to train him to be a waiting horse. Get the reins short and the hands up and get the horse back on his hindquarters.”
“If your horse is strung out you have to pick him up, lift him back and then relax. Slow him down and balance him back against your heel. More advanced work needs more contact and release. If he doesn’t know how to go in self carriage, his hindlegs are out the back door. Put him into friendly contact, contact allows us the possibility to put him together with compression. We’ll teach him to carry himself, waiting to jump. It doesn’t change when you jump ten feet!”
“You’ll get where you don’t even want reins, and they’re just beautiful and balanced, and dynamic.”
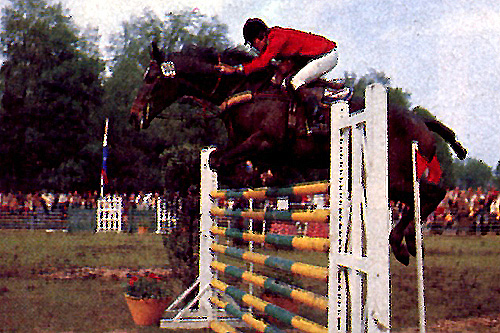
JUMPING EXERCISES – and being on the right spot at the right time.
The US Gold Medallist Bill Steinkraus once said, ‘What the horse does in the air over a jump doesn’t interest me. What is important is what he does in between the jumps…”
Kathy had spent the most part of her session working on self carriage, lengthening work, leg yields, and then canter work. The canter work had been quite demanding for both horse and rider – Kathy really wanting the riders to have three distinct canters: collected, ordinary and working. We were to soon see why…
“We have been working with a little release at walk and at trot and at canter, and we’re practising our approaches in self carriage so the horse learns to carry himself towards a jump. And when he learns to do that he is very relaxed and confident as well. Now, you get your strides between fences not by making a big charge and kicking, you get it in the free area by getting the right gallop. If Joe Fargis had kicked Mill Pearl at the Games she would have gone to North Korea. You just have to give a little bit. Remember how you got your canters on the flat, let his neck out and make the stride longer, loop the rein if necessary, don’t lean but give through the turn on the approach to the fences. Loosen the rein, open the front door. If you don’t give through the tum, you’re going to lose some of the pace and some of the dynamics. Then you’ll have problems on course with oxers off the short end, and combinations off the short end of the arena which is all the time, people do it on purpose. And then if you need to steady for the distance you’ve still got plenty of dynamics and pace.”
LOOSE REIN WALKING
“When you are giving your horse a break the most generous thing you can do is to give his mouth freedom. Let him walk with his nose right down to the ground, with his hindlegs actively under him. Put his nose right down to the ground, just hold the buckle of the rein. It is entirely different to being on the forehand or walking with a fast rhythm.”
GETTING BETWEEN THE WINGS
For all their clean and classical style, there is nothing wimpy about the American showjumping rider, and stopping is one little act that is firmly discouraged…
“The first thing about jumping is to get the horse between the wings… NEVER ever circle a horse in front of a fence.”
“If your horse does refuse a fence correct him sharply with a direct, wide rein opposite to the direction he has run out, then use your whip behind your leg standing in front of the fence, without kicking. If he stops again, whip him hard again right away.”
REIN BACK
Part of the beauty of one of Kathy’s lessons is the precision she looks for, there is a correct way to do everything and it must be done that way. Kathy used rein backs and turns on the forehand as finish off exercises for all jumping sessions and it was characteristic of Kathy’s quest for precision that this was an equally important part of the exercise.
“Shorten your reins from the halt, because at halt the body is longer and you are always having to change the length of rein to keep it correct, and ensure your hand is in front of the wither where you can do everything. Shorten your rein and find his mouth and just say ‘Hello’. Don’t ask for anything, and after you’ve said hello, against your heel, close your fingers and draw back with your arm to ask for a step of rein back. And give as he steps back. Then ask for another step and give again, ask for one step at a time and give. If he swings his haunches to the left, draw back a little more with the left rein and less with the right.”
TURN ON THE FOREHAND
“Always start with your horse straight with a line that’s parallel to the long side. Always, in all your work, when you see a line, make yourself straight on it, that makes it cleaner in your mind’s eye and that’s the record so you make the movement very correct.”
“Let’s make it turn on the forehand to the left, so put the whip on the same side as the active leg, which is the right leg, because you may have to use it to help tell the horse to move his haunch from your right leg. The left heel, the inactive heel is going to feel a little brace to the front to give you security, to stop you sliding forward, the right leg is going to come back and tell his hock to take one step to the left. The two reins keep the head, neck and shoulders totally straight. The two reins keep him from working forward, and if he starts to back up the two reins are going to give, and he’ll just instantly go back to the spot where he was before he started to back up, and then ask for another turn on the forehand step. Take five minutes to do it if necessary. You get one step and stop and give, just like a rein back. Go forward before you do another one to keep him thinking forward.”
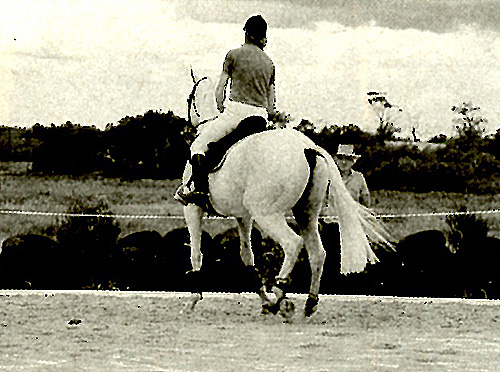
I ‘ve watched Kathy training at Gladstone with Bert de Nemethy many years ago, and have always admired her style.
If that last comment was from Jennifer Stobart Howard, who trained Mark Todd’ s Charisma to Prix St. Georges,I was fortunate to have her as my teacher in 1963-1967. She took me and my 3/4 TB Appaloosa Night Train to the US National 3 Day Championships, and she certainly did use Bert de Nemethy”s principles. .Kathy Kusner later rode my timber steeplchaser Whackerjack as the first woman to ride in the Maryland Hunt Cup in 1971Their photo over the huge 13th fencs on Kathy’s fascinating website. Kristine Lindley Matlack DVM