


With Richard Weis
Now how many times have you heard an instructor stress the importance of correctly warming up a horse – how many times have the great trainers emphasized that the progressive nature of the horse’s work is crucial to the ultimate success?
That the horse must first be worked long and low, forward and round, before any more demanding, or collected work is attempted.
Think then of the poor rider!
No one stresses that he or she ought be warmed up loose and relaxed before the work begins. Ponder then the contradiction between a tense, uptight rider desperately trying to make the horse relaxed and calm.
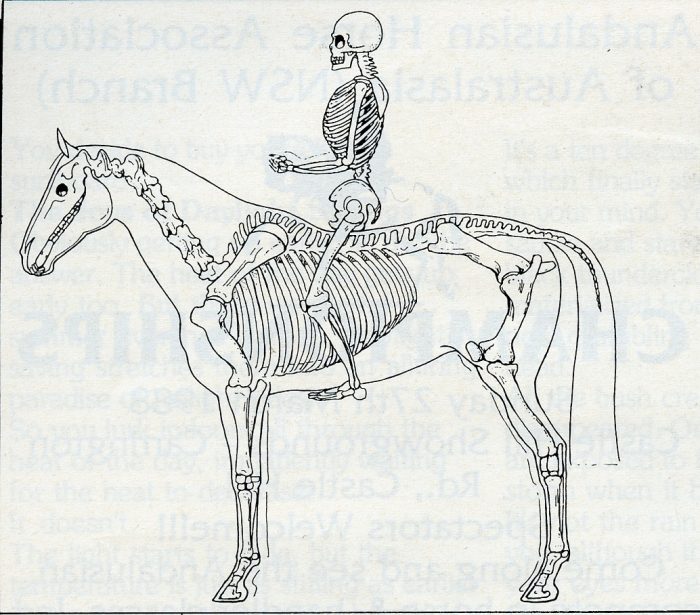
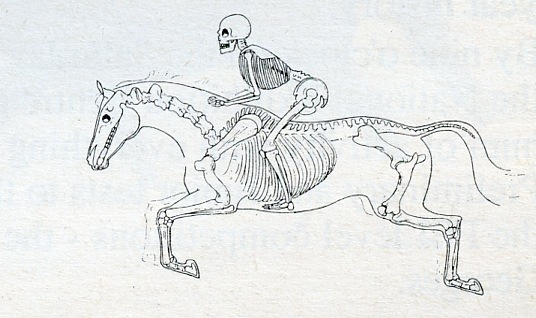
Let’s look again at our rider at least as attentively as we look at the horse…
Sally Swift, the author of Centred Riding, consulted with Peter Payne (tai Chi and Alexander Technique teacher) to develop a quick, easy and efficient warm up practice for riders. The ‘shake out’ lubricates and softens the joints and tones the muscles. It helps a rider develop a good working knowledge of the skeletal structure which is left in better order to withstand the inevitable jolts and jars of riding.
Along with Semi-Supine (see below), the Shake Out is used by many riders as ‘routine maintenance’. If the two are practiced together, the Shake Out is best followed by Semi Supine.
Before commencing the shake out, take time to observe yourself. Stand in balance with your legs shoulder width apart. Check that your knees are not locked back. Close your eyes and notice how much energy you are using to keep yourself upright. You may feel tension in particular areas of your body. Open your eyes and walk for a minute or two, and observe how freely you move about. Allow yourself time to get to know your body movements. The same patterns will appear on horseback.
For the first few times you practice the Shake Out, it is interesting to observe yourself before and after the Shake Out.
Before Shaking Out the joints of your arm, stand in balance again with your eyes closed and wave one arm about in space. Notice the weight of your arm and its range and freedom of movement.
SHAKE OUT RULES
- Each joint must be shaken by the structure above it.
- Everything from the joint down must be limp (Moving a joint with its own muscles will not help to free it).
- One minute is ample time to shake each joint. Joints can get sore with over shakes.
- Stay aware of the joint you are shaking and shake only in directions for which it was designed to move.
- If you have any physical problems or injuries consult your doctor before shaking out.
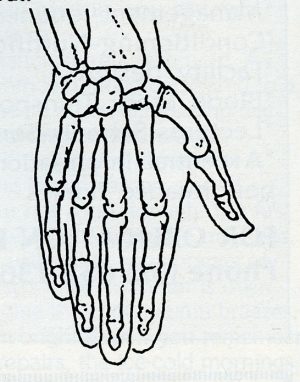
Shake the wrist
Notice the bones of the wrist and hand.
The complex structure allows movement in many directions. Move the forearm up and down and allow the hand and fingers to remain limp. It is like flicking water off your hand. Shake the wrist through its full range of movement from side to side and in circles.
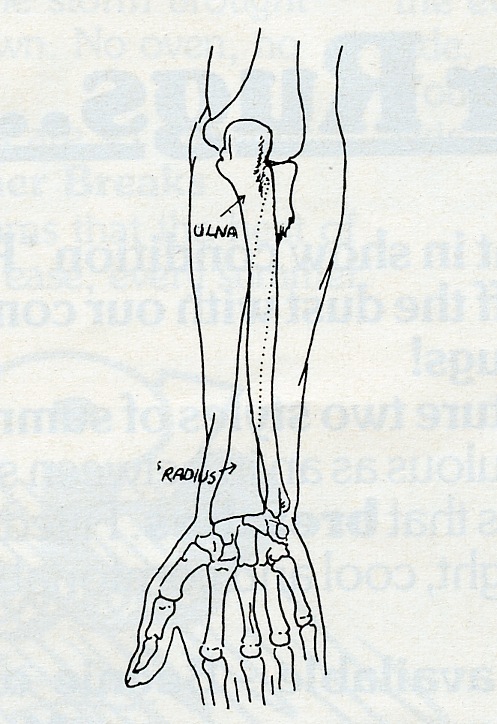
Shake the elbow joint
The elbow joint opens and closes at the same time, allowing rotation of the lower arm. Allow the arm below the elbow to hang loose. Move the upper arm up and down with your elbow moving out to the side. This movement will cause the elbow joint to open and close and the lower arm to turn in and out away from the body as the radius rotates around the ulna.
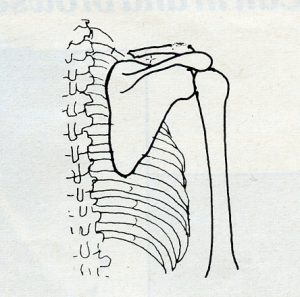
Shake the shoulder
Your arm dangles from a loose ball and socket joint which allows a vast range of movement. Additional movement is made possible by the slipping of the shoulder blade on the back and the mobility of the collar bone.
Check to see your knees are not locked back. Leaving your whole arm to dangle limp from your shoulder joint, move your torso backwards and forwards. Your arm will be flung about and your shoulder blade will slip and slide on your back.
Now you may like to move your arm about in space again. Close your eyes and feel the weight of your arm and how freely it moves. Let it hang, and compare it with the other arm. Go ahead and shake out the other arm, wrist, elbow, then shoulder joint.
Stand in balance again and notice a leg.
Feel how your foot contacts the floor. Move the leg about and feel its weight and freedom of movement. Leg ‘Shake Outs’ are one leg. Hang onto support if you need it.
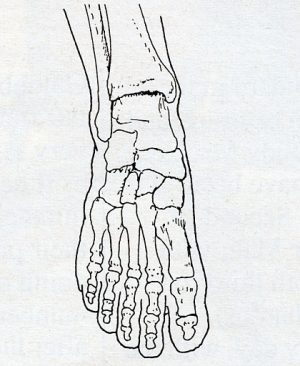
Shake the ankle and foot
The complex structure of the ankle and foot allows a wide range of movement possibilities. Move the leg to shake the foot loose. Check that your toes are loose and allow them to wobble as you shake. Place the foot down again and notice how it spreads on the floor. Compare it to the other one.
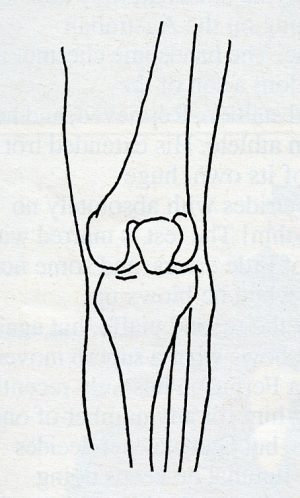
Free the knee
The knee is designed to allow the lower leg to swing forward and backwards. It is very limited in sideways flexibility. Swing the thigh and pelvis back and forth allowing the leg from the knee down to dangle loose. Do not drop the knee open. To check you are doing this correctly stop the thigh movement and the lower leg will hang vertically towards the ground. The leg dangles from the hip joint which is a ball and socket deep inside the body. It allows the leg a considerable range of movement and is well designed for riding.
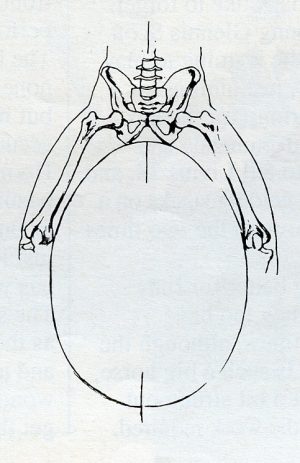
To locate your hip joint – stand on one leg and bring your other thigh up parallel to the ground. Feel for a stringy tendon in the crease between your leg and torso. Your hip joint is inside that tendon an inch to an inch and a half below the surface. Your leg pivots from that point.
Stand on one leg leaving the other one to hang limp. Rotate your pelvis vigorously so your leg swings to make a circular movement of your pelvis. Your pelvis is causing the movement of your leg. Stand with your eyes closed and feel the leg you’ve shaken out. Investigate its weight and freedom of movement. Compare it to the other leg.
Shake Out the other leg, foot and ankle knee and hip joint.
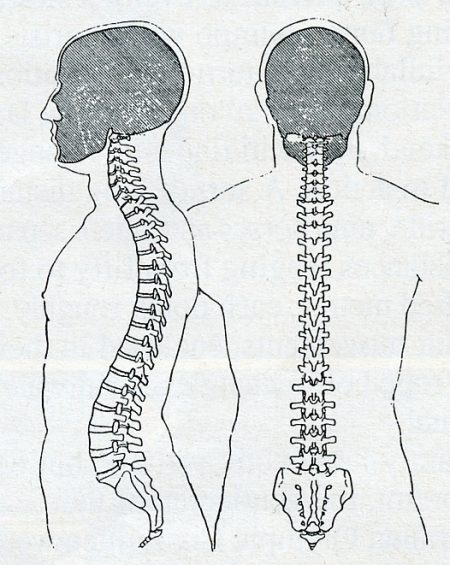
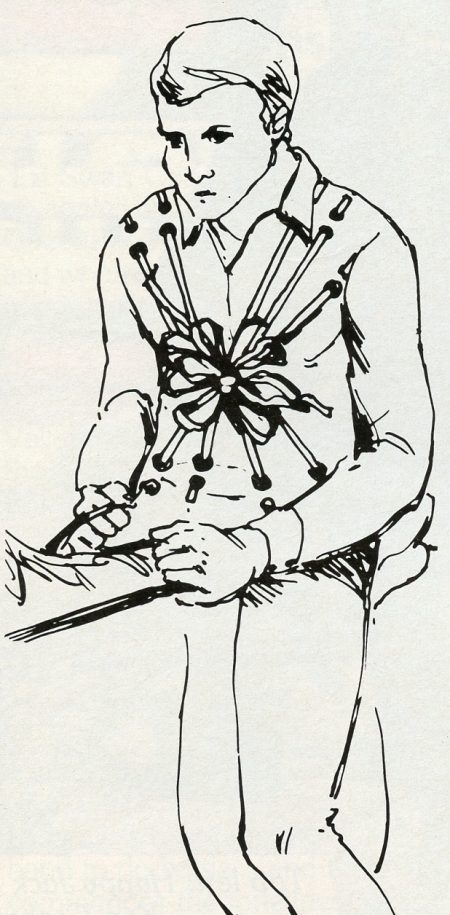
SHAKE THE. SPINE. LIKE A STRING OF BEADS
Stand in balance. Notice the balance of your head on your neck and the tone of your torso. To familiarise yourself with the movement to be used to shake out your spine like a string of beads, stand with your feet shoulder width apart and knees bent. Push one side of your pelvis and the knee forward. Let it come back, and push the other side forward. Vigorous shaking of the pelvis and flexing of the knees are the necessary movements.
The spine is like a tight strung set of beads. Shake one end and a wave of movement travels to the other. Leaving your knees bent, bend so that your head dangles towards the ground. Your whole torso, head, neck and arms, hang limp.
Move the pelvis and knees vigorously to shake out the spine. Check that your head is dangling free. The tendency to want to hold it up is strong. Shake for twenty seconds or so, come up again.
Repeat the procedure.
Once again stand in balance and check the balance and freedom of movement of your head and neck. Notice the tone of your torso. How much energy are you using to hold yourself up?
Walk about and notice how freely you move. After a Shake Out, many people report feeling stable on the ground. If someone pushed them, they wouldn’t fall over. Their ‘groundedness’ – which is the feeling associated with an improvement in the body’s opposition to gravity – gives the rider stability on horseback.
Any time you feel tight or uncoordinated, STOP and go through all or the relevant parts of the Shake Out warm up. Stranger things have happened behind closed stable doors at notable events than a good healthy ‘Shake Out’.
Next Step – Semi-Supine
Semi-Supine… an on-the-ground practice to help riders release excess habitual tensions. We will use gravity, that constant force we strive to oppose every second of our lives, and a firm surface, to lengthen and widen our bodies beyond the confines of our habitual tension patterns. In other words this practice helps us release the ‘jammed hand brake’.
For most people driving the body with the hand brake on feels normal. Take it off, and they feel light, balanced and coordinated, quite an unfamiliar experience. If you would like to get your body ‘off the forehand’ so you can choose more efficient patterns of movement, include this practice in your daily routine maintenance and make it as much a part of your normal routine as cleaning your teeth.
You will need a few Paperback books. As many as would fit between a wall and the back of your head if you stood normally against it.
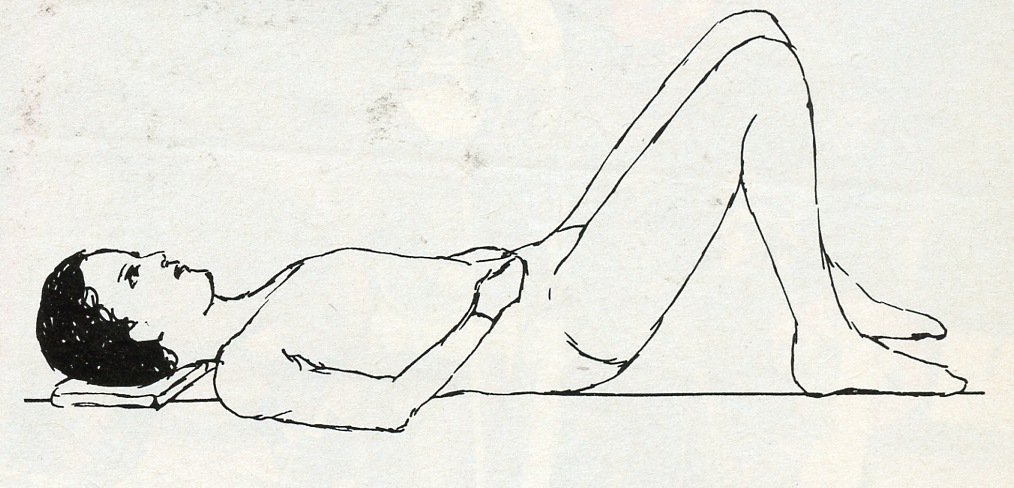
SEMI-SUPINE…an exercise
Keep your eyes open throughout
- Lie on your back with your head resting on the paperbacks.Leave your neck unsupported like a bridge between your head and your torso. If your head is tilted back, you have too few books. If your chin is locked into your throat, you have too many.
- Bend your knees toward the ceiling until your feet lie flat on the floor, about a hip width apart, and as close as is comfortable to your buttocks. Balance your legs between your hip joints and your feet in such a way as they neither fall together nor apart.
- Place your hands flat on your torso with your elbows resting comfortably on the floor.
The weight of your body will be supported by the floor with contact points being the back of your head, part of your shoulders, parts of your back, the back of your pelvis, your heels and the pads behind your big and little toes.
Explore how much of you contacts the floor and how it feels. Explore the rest of your body. Let your attention flow freely from one part to the next, doing nothing except observing the state you are in. Consider the internal environment of your body.
As you explore the internal spaces of your body you may feel yourself spreading out over the floor. Allow this but do not push to encourage it. Play with ideas of feeling very wide. Think your body into spreading width ways. Now think of growing long between your pelvis and the top of your head.
Observe the effect of your thinking on your body.
To stand up … Allowing your back to remain straight and long, roll onto your side. Push yourself onto your knees and stand up.
Stand square on your spreading feet for a moment. Allow yourself to be your full height. Feel how your weight relates to gravity from the top of your head to the bearing surface of your feet on the ground.
The Semi-Supine position may get uncomfortable. If so do it often for shorter periods. 15-20 minutes once or twice a day is wonderful for relieving typical rider aches and pains in the shoulder, neck, back, hip and ankle soreness.
Practice semi supine as a preventative or as a treatment if you feel a bit knocked about after a ride.
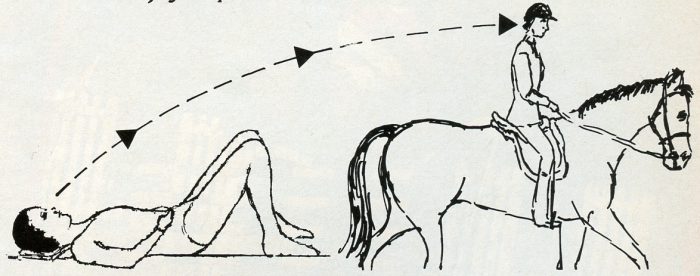
Take the attitude of expanding yourself onto horseback. Ride forth into a space that is wider and taller than you are and enjoy improved balance and coordination.
PS. For those of your who practise TEAM work, Semi-Supine lowers your head, gives you a neck release, pulls your tail and gives you a belly lift all by the grace of gravity.